

How To Repair Electronic Starter Craftsman Snowblower
Having spent most of my life in warmer climates, I was fifteen years old when I first saw snow.
I was captivated past it. I loved being out in the snow, playing snow sports, and even shoveling. To this twenty-four hours, I even so beloved snow.
I've always wanted a snowblower, but nosotros've never had a stiff demand.
Afterwards moving into our new business firm with a massive driveway, the snowfall last winter was too much. Subsequently a major storm, my neighbor lent me his snowblower, and I was enthralled.
It was so much fun to use, and even though I enjoy a skilful shoveling workout, it freed up a lot of time to play with my son in the snow.
So I was adamant to go my own snowblower for next winter.
 Purchasing an Old Snowblower
I started my snowblower search early fall. My goal was to observe a proficient car without spending a lot – fifty-fifty if information technology meant fixing an quondam snowblower.
I already had a lot of experience maintaining my mower – a 20-twelvemonth erstwhile Craftsman riding backyard mower.
From simple engine oil changes to fuel pump replacements to carburetor rebuilds, I have the former riding backyard mower running similar new.
So, I decided to wait for a used snowblower.
Due to my experience with the Craftsman brand, I know that their replacement parts are plentiful and cheap online.
They besides provide manuals and parts diagrams for almost every model equipment they make (only enter the model number on SearsPartsDirect.com).
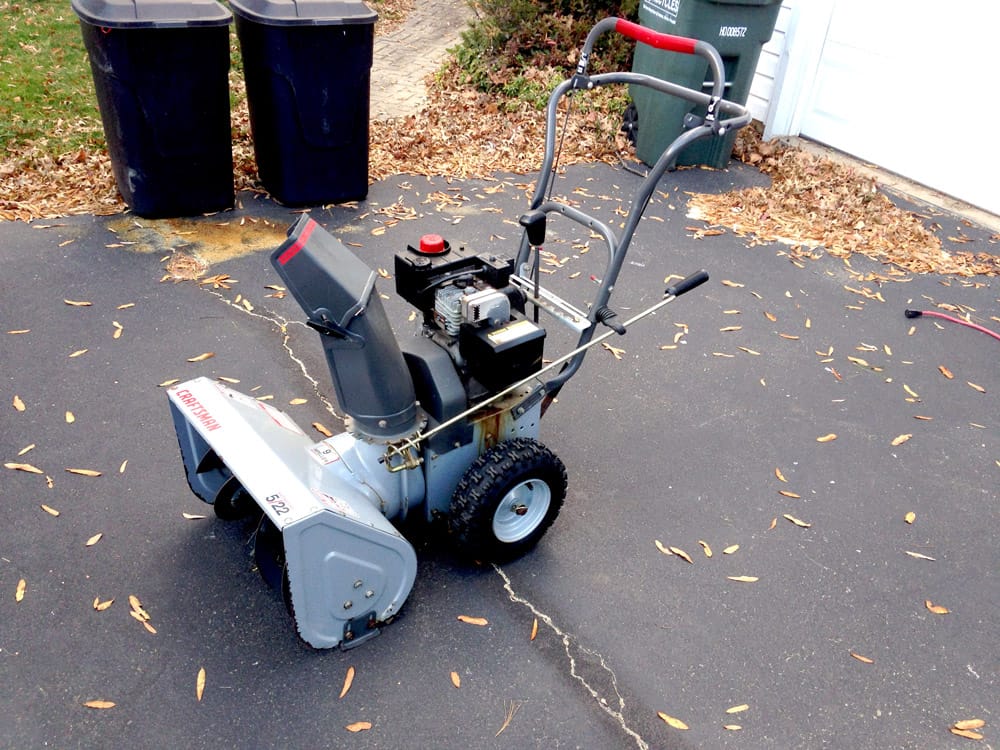
I institute an amazing deal – $125 for a Craftsman 5HP two phase snowblower with an electrical start. Comparable ones were selling used for around $275.
For such a low price, I knew the one-time craftsman snowblower wasn't going to be in perfect condition, so I kept my expectations low.
Inspecting the Used Snowblower
Upon my inspection, the snowblower was missing the pull cord for manual startup, and the carburetor would leak fuel every at present and then.
It was also missing the control knob for the choke.
The guy selling it said the sometime craftsman snowblower would start making surging sounds afterwards some time, until you fiddled with the carburetor fuel release screws.
He started information technology up though and it ran great.
I checked out all the forward/reverse gears. I inspected the impeller to make sure it was in good shape. The auger had no structural damage.
I was excited. For around $40 more than in parts, I could get this former snowblower in top shape.
I happily accepted the offering of $125 and loaded the used craftsman into my SUV, with plans on fixing upwards the old snowblower.
I had brought along a pair of ramps I fabricated a few weeks agone with two ii×8 forest planks and ramp supports.
This helped me load the used snowblower in the back of the car.
I did have to accept out a few screws to fold the push handle in one-half to fit properly though.
I besides wrapped the carburetor in a plastic bag to take hold of any fuel that was leaking (didn't demand the automobile smelling similar gas for days).
Here's a picture of my used snowblower before fixing it up:
 Ordering Snowblower Replacement Parts
When I got home, I grabbed the snowblower model number off the dorsum and went online to order some parts:
 Based on my assessment of the machine, I put through an order for the following parts:
- Carburetor
- Pull starter rope and handle
- Knob for choke
- Spark plug
The cost for the snowblower parts came up effectually $40 as I predicted. I considered rebuilding the carburetor (the leaking was probably from a deteriorated rubber seal), only new carburetors for this model were so cheap (around $fifteen).
I actually just replaced my neighbor's snowblower carburetor with the verbal same 1 a few weeks ago too.
Fixing an Old Snow Blower
All my parts for the craftsman snowblower came about a calendar week later on and I went to work restoring the machine to tip-meridian shape. Below is a walk-through of what I did. Hopefully these craftsman snowblower maintenance tips can help y'all too.
Disconnecting the Craftsman Carburetor
I located the craftsman snowblower carburetor housing:
 And so, I removed the housing to betrayal the snowblower carburetor:
 I disconnected the yellow priming hose seen in a higher place (used to pump air from the priming bulb into the carburetor to force fuel out for a cold start), followed past the main fuel hose below:
 Information technology was important to clamp off the main fuel hose or fuel would immediately pour out one time asunder.
I used a vice grip, taking intendance non to squeeze then tightly that the hose would get damaged.
Fuel hoses are sometimes tough to disconnect, and then I used special curved nose pliers to grip the hose and twist:
 I had a plastic cup underneath the hose while disconnecting information technology, in case my vice grip clamp didn't do a good job.
A give-and-take to the wise however – don't use cheap plastic cups to concur gasoline. I didn't retrieve it was a big bargain considering I used a plastic cup the other twenty-four hours to catch some excess gas from my neighbor'due south snowblower carburetor.
Yet, this time, a few minutes afterwards collecting some gas, I noticed a modest pool on the garage floor.
Apparently the gasoline had eaten through my plastic loving cup!
I looked it upward online, and discovered that some plastic cups are not friendly to gasoline. Virtually probable my plastic cup this time was made from a corn based product, which would be dissolved past the gasoline.
Next, I unhooked a metal link wire connecting the throttle control lever to the carburetor, and attempted to remove ii bolts holding the carburetor to the engine cake.
Removing the Snowblower Carburetor
The bolts were on extremely tight and I could non remove with a screw driver. The screw heads actually started stripping.
So, I brought out my impact drill and it did the task with ease:
 Hither's a picture of the removed craftsman carburetor:
 The removed piece actually consisted of more than only the core carburetor, so I had to strip information technology downwardly to extract the carburetor (seen in the center of the picture below):
 The piece on the right is called the intake pipe and connects the carburetor to the engine cake.
Unfortunately, when I pulled it off the snowblower engine, a gasket in between the two ripped from sometime age.
My new carburetor didn't come with this gasket (since information technology's not technically function of the carburetor), so I had to order a replacement.
This meant I had to wait a few days to actually fire up the auto with the new carburetor. I could still proceed with the installation though, and just insert the gasket when information technology arrived.
Here's a picture showing where the gasket would go on the snowblower:
 To install the new carburetor, I just reversed the steps above with the new slice. I loosely connected it back to the engine block, awaiting the gasket for completion.
Spark Plug and Starter Cord
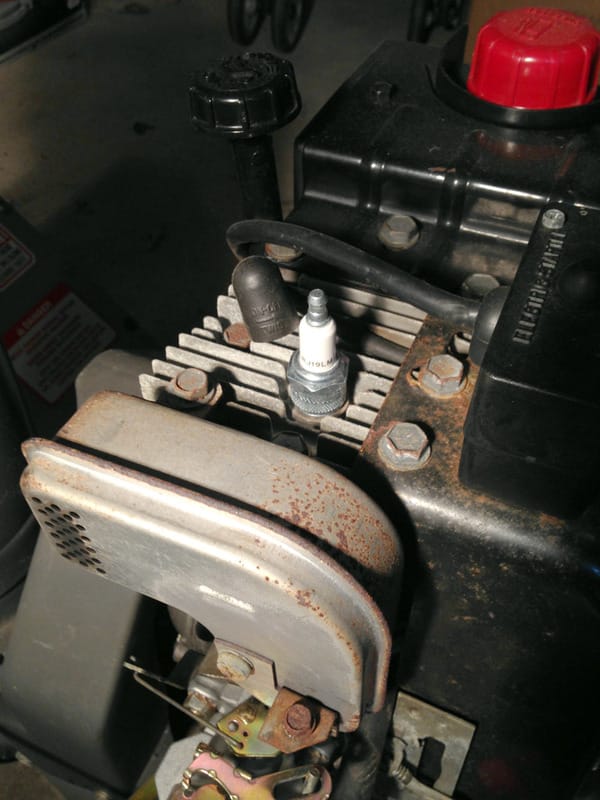
Adjacent I replaced the snowblower spark plug:
Afterwards, I proceeded to fix the snowblower pull string for starting it up. The original rope most likely broke from old age.
Here'south where the fix was to be washed:
 Here's a picture showing the new pull starter rope and handle to be installed:
 And, here'south the snowblower pull string housing removed showing the old frayed rope:
 I merely removed old pull string and threaded in the new pull started cord, coiling it effectually the starter. Here'southward a movie showing the repaired starter rope:
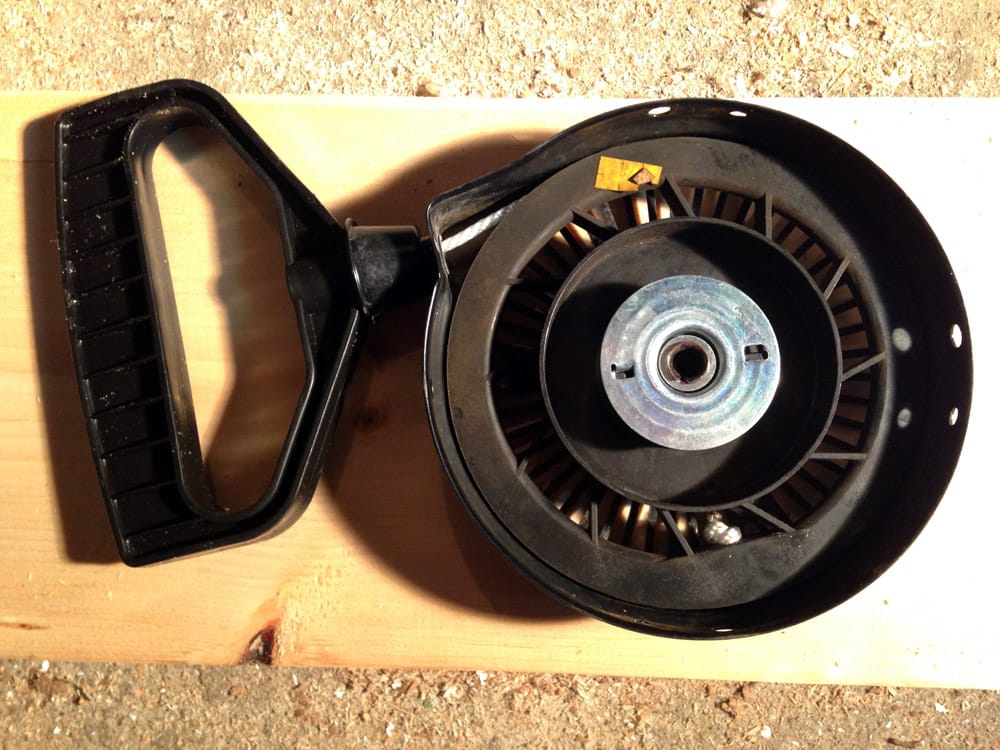 The snowblower pull string remained secured to the starter and handle with knots on both ends.
To keep the knots from undoing, I used a lighter to cook the end of the polyester rope slightly (likewise a necessary stride when cut polyester rope to keep the ends from fraying):
 When the intake pipe gasket arrived in the mail a few days later on, I resumed piece of work on the snow blower. I installed the gasket and secured the carburetor tightly to the engine block.
The craftsman snowblower was ready to be fired upward. I rolled information technology exterior and hooked up an extension cord for the electric start.The engine started upwardly correct away with the new carburetor and there were no more leaks. I also tested the snowblower'south pull starter with the new rope. The engine started upwardly just as easily every bit the electrical beginning.
Snowblower Engine Oil
Side by side I was going to modify the snowblower engine oil. I allow the engine run for a few minutes to warm upward the engine oil (warm oil flows more freely when draining it).
Then I close it off and proceeded with the oil modify.
After remove the oil dip stick, I used a small funnel with a hose and an oil storage reservoir and tuckered the warm oil:
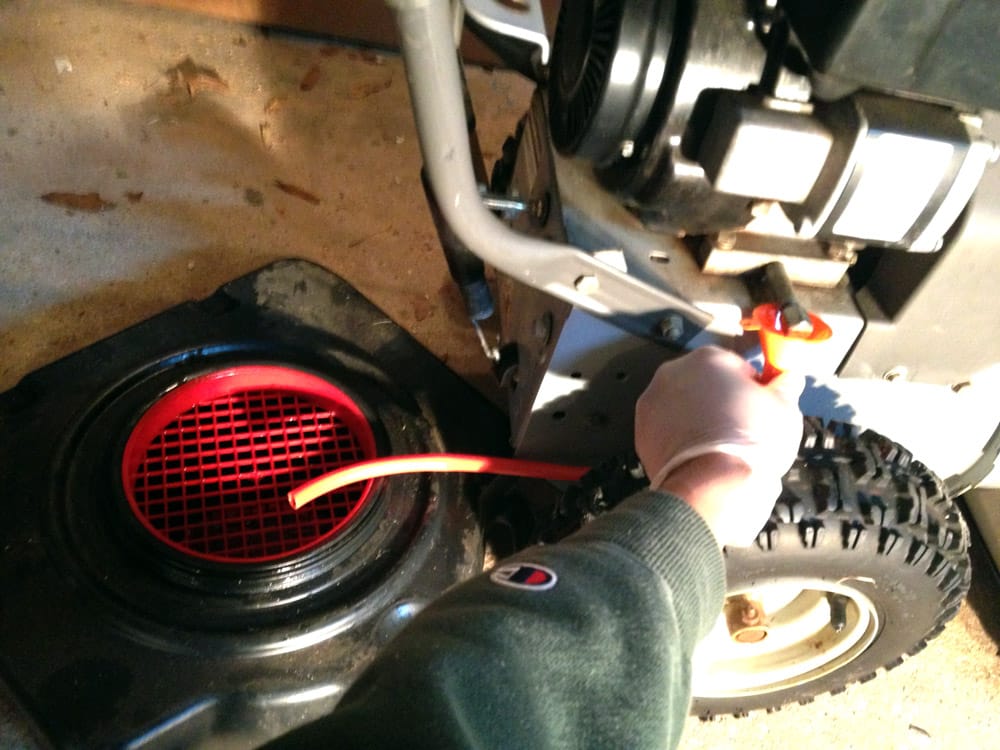 After all the snowblower'southward engine oil was drained, I airtight dorsum the drain port and began filling 5W-30 motor oil into the dipstick hole:
 While filling the engine oil, I took breaks regularly to check the level with the dipstick.
I learned the hard fashion that when you overfill the snowblower engine with oil that it's going to come out of the engine ane way or some other, and not in a nice fashion.
Final Craftsman Snowblower Maintenance Tips
The craftsman snowblower revamp was nearly done. I replaced the missing choke knob. Also, the carburetor housing was vibrating excessively due so some missing screws, producing a lot of noise with the engine running. I dug through my garage screw collection until I plant a fit.
Finally, as my final footstep in fixing upwardly the quondam craftsman snowfall blower, I applied some non-stick ice and snow coating to the auger blades and impeller chute. This prepared the snow blower for the upcoming wintertime flavour.
This would profoundly aid forestall the snowblower chute from clogging up during use, and allow the augers to cut through the snowfall similar butter.
Here's the snowblower not stick spray:
 In total, I spent around $165 on purchasing and fixing an erstwhile snow blower ($125 to buy and $40 in parts) and put in less than iii hours of piece of work to get it in prime number condition.
I'chiliad eagerly looking forrard to this upcoming winter and the side by side major snowstorm then I can employ my new simply used craftsman snowblower that's running great.

How To Repair Electronic Starter Craftsman Snowblower,
Source: https://www.justmeasuringup.com/snowblower-maintenance/
Posted by: lightnerrater1974.blogspot.com
0 Response to "How To Repair Electronic Starter Craftsman Snowblower"
Post a Comment